


|
|
|
|
|
|
|
|
|
|
|
|
Unusual because of the low miles and protection she
received with the
original owners. (I thank you, Bob & PK!) The original dealer tag
(Albuquerque, NM) is still on the turtle. She spent most of her life
under a cover in a garage or carport, and amazingly enough, there
is no major corrosion under the battery.
The car was inoperable on acquisition in March 2000 as she hadn't been
started in 3 years because the ignition module was burnt out. It was the
second to burn in a year, and at $300+ per the previous owners were
not going to spend any more money on it.
The only major work ever done (as far as I know) was a clutch replacement.
I have nearly every receipt for parts and service ever spent on the car.
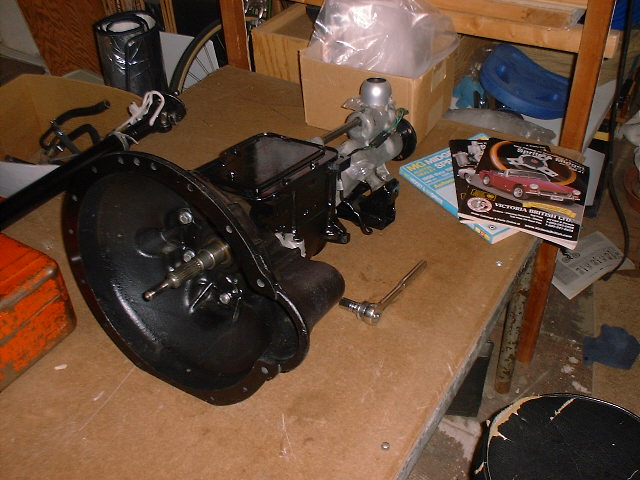
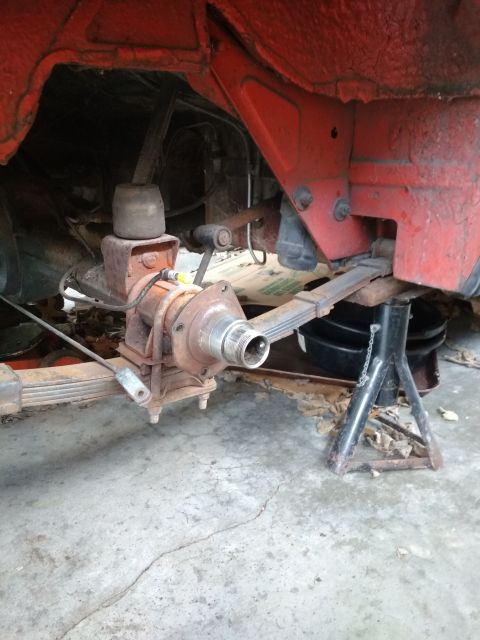
During disassembly I took the bell housing off the transmission and
found no seal to keep gear oil in the gearbox. This explains why the
bottom of the car is nearly totally covered in oil and has NO RUST! Best I
can tell, the seal carrier was malformed in manufacturing, would not hold
a seal, so the seal was omitted during original assembly. This is rare,
eh? All the gear oil on the bottom of the car has protected the pan.
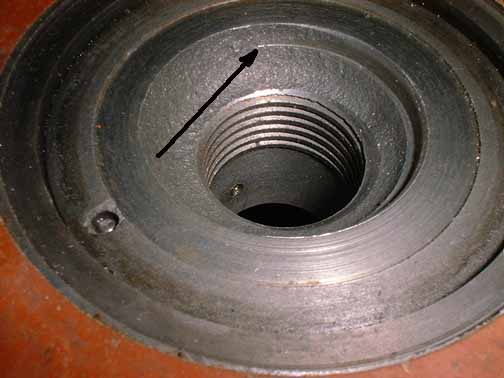
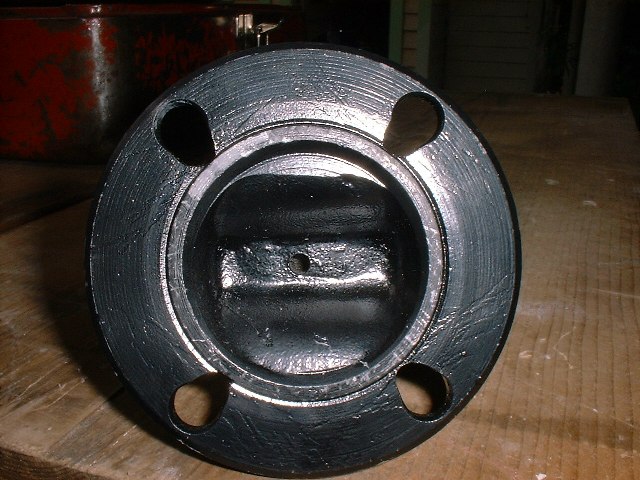
In the photo below, the arrow at the crescent indicates end of the cut that should go all the way around. Close examination reveals the casting is obcentric, tho the cut is aligned with the central opening.
So I spent 25 Bucks to get a replacement and when I attempted to drive the pin in I did this! Dang!
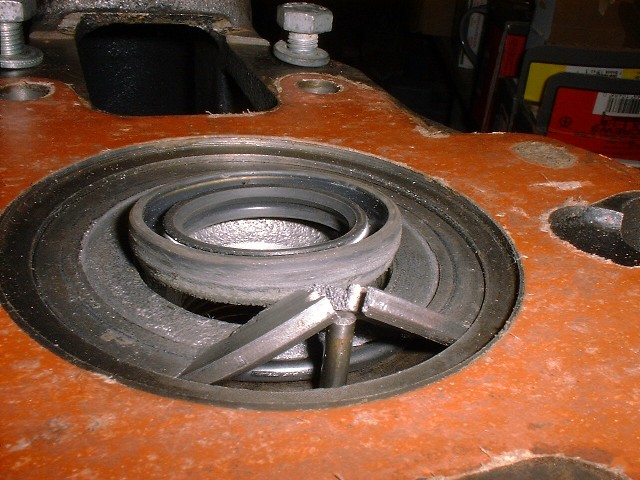
So I put the original back in with no seal to keep it uniquely British.
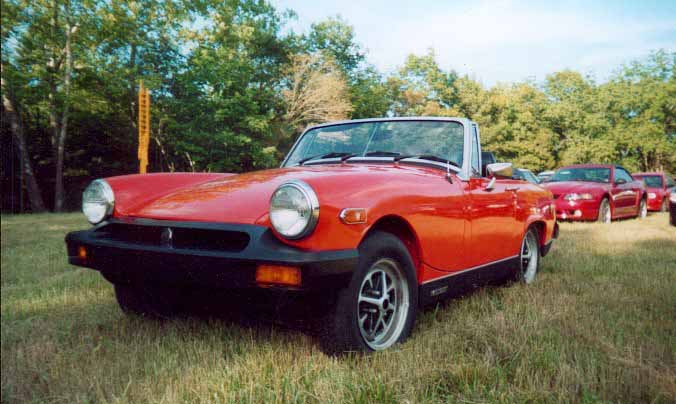
This next photo was taken the evening she was delivered.
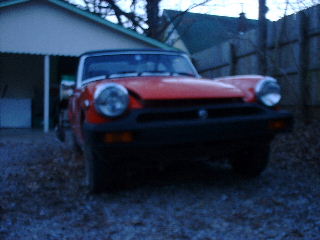
The wheels looked like this.
The first things done that Spring 2000 were:

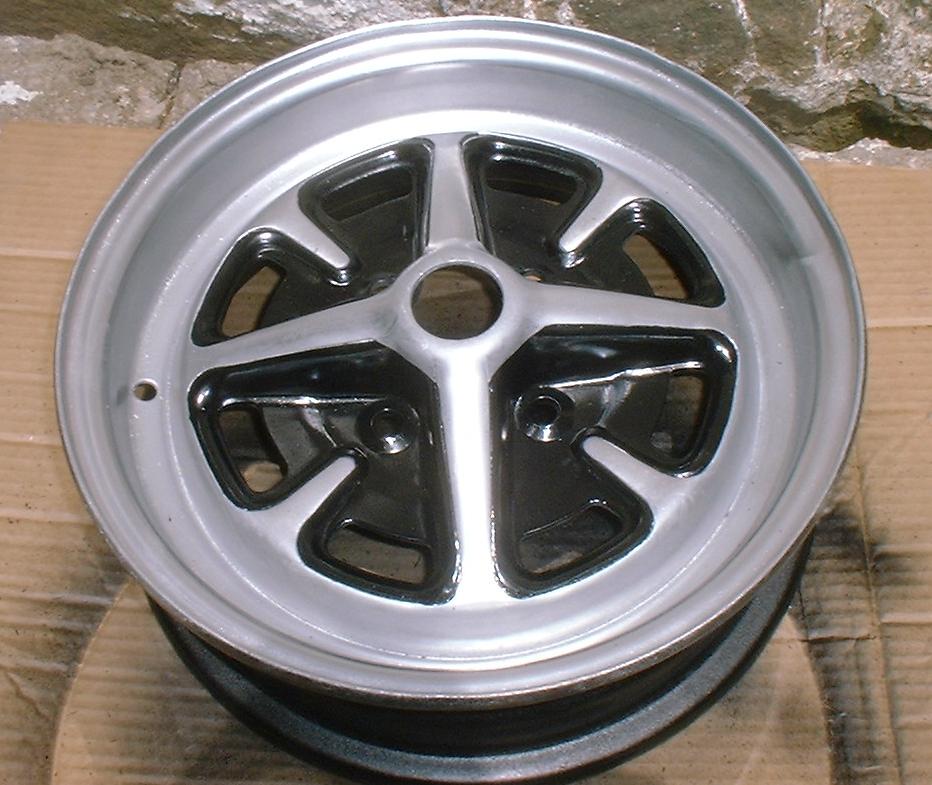
In Nov. 2006 Joanna in Ireland asked about the process of painting the wheels, so here's three pics in sequence:
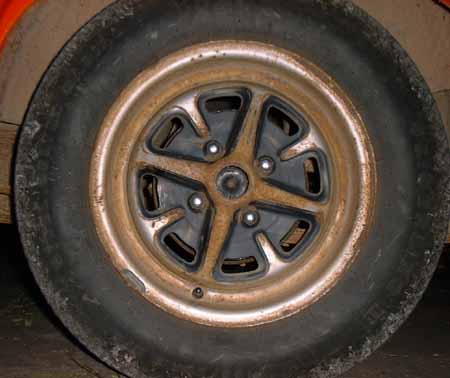
After 5 years of weather and neighborhood dogs, the wheels were getting a
bit "rustic."
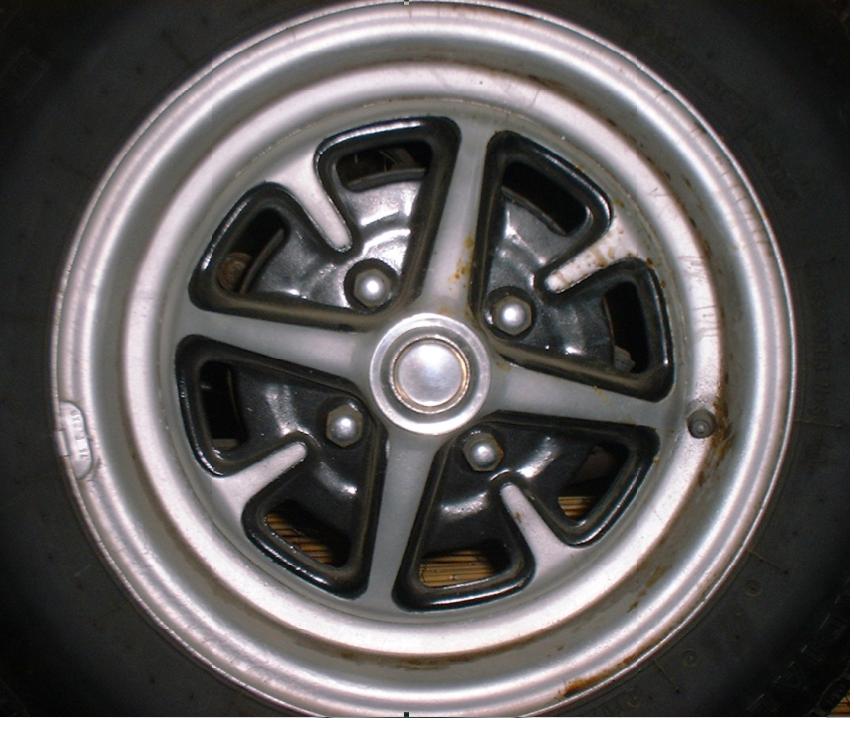
With tire removed on a hot sunny day, I hand-sand the entire thing, wash
with soap and hot water and let it dry thoroughly, primer gray the whole thing, let the paint dry, then
spray the interior and back of wheel black, and when dry again, the front
face gets silver, except where it will be black. A bit of overspray is no
problem. Because I have no baking oven I depend on sunlight to bake
the paint. It doesn't cost me any extra because I own the rights to
the energy of the sun.
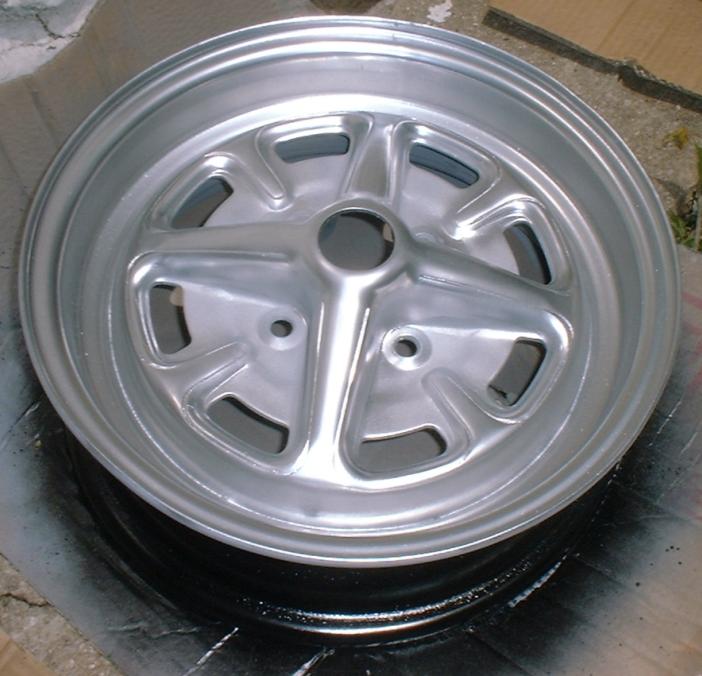
I have no pics of the masking tape and paper, but it's a process of
applying blue painter's tape (the adhesive is good for only a few days)
and lots of newspaper around the outside so the black only goes where I
want it. You'll notice a bit of black between 2 and 3 o'clock, but it was
easily fixed with a spritz of silver.
Back to the first year (2000) of work:
In 2001 I:
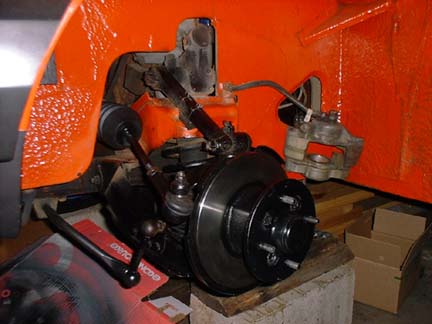
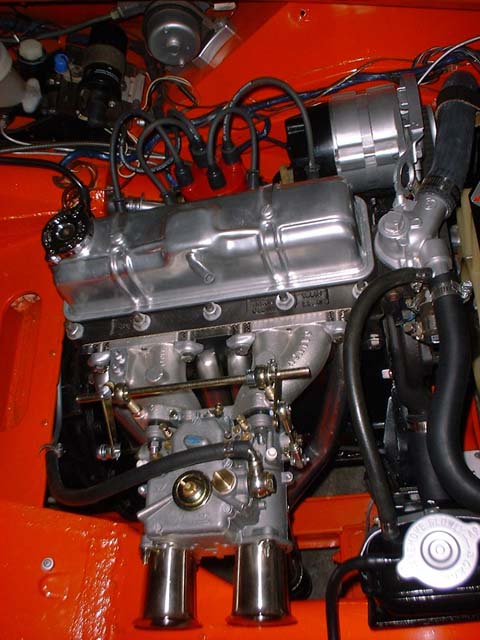
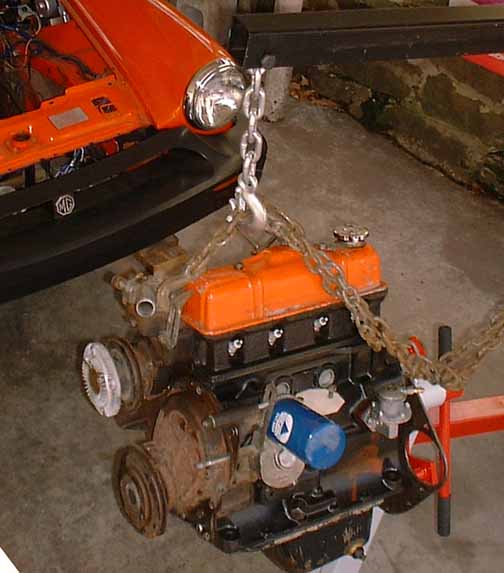
Spring of 2003 I pulled the engine for cleaning, paint and a new clutch. Then I went to the Green River in Utah.
Here's the engine and chassis with 24 years of dirt and oil.
The shelf at the top is the battery location, and it is not rotted out!
The timing chain cover has a little rust, but otherwise the engine
is in great shape. I estimate maybe 40,000 miles total.
The engine freshly painted, other than I got the wrong color paint on the
valve cover
I later painted it silver.
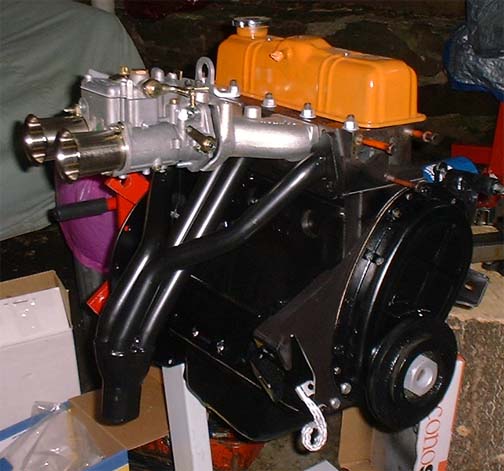
Work performed in 2003:
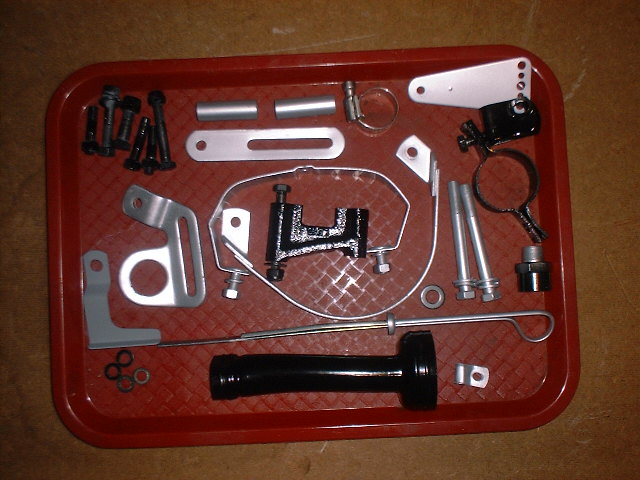
... and cleaned up a tray of miscellaneous parts.
SUMMER 2004 and I'm nearly done with this project.
6/20 (Solstice) I pushed her out into the sunlight for cleaning, vacuumed
a bucket of cobwebs
and spiders from underneath, and washed the oil
from
the chassis.

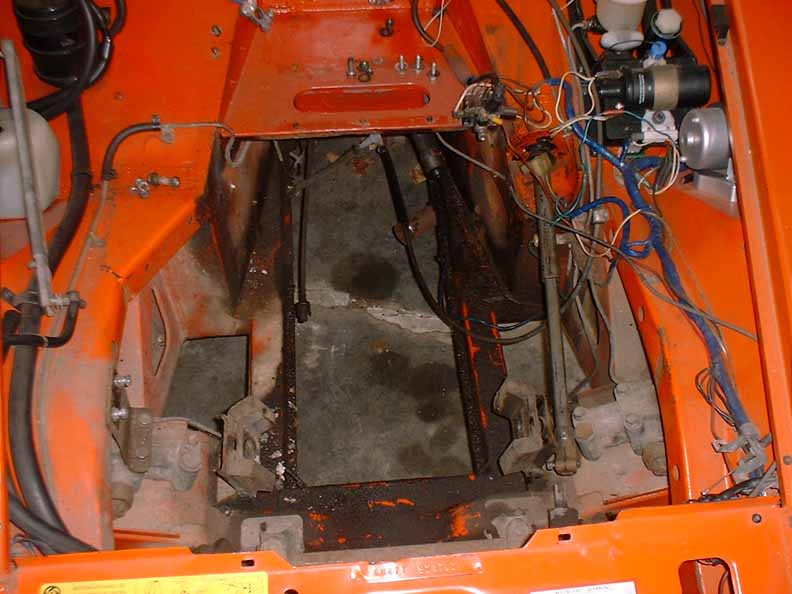
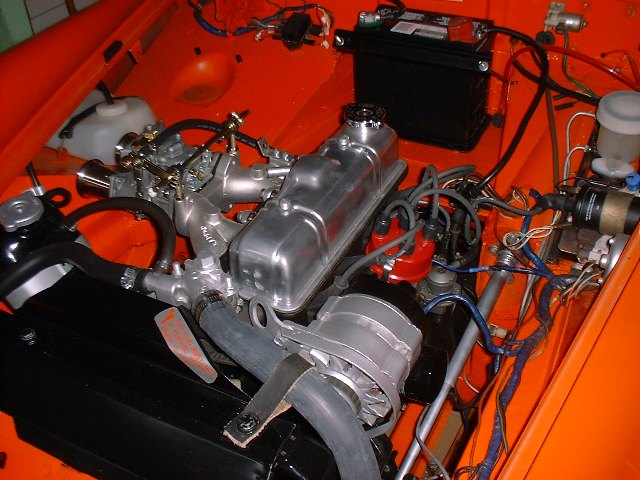
Engine compartment after hours of cleaning and paint.
Notice the air horns at the top of this image. They are SO
much louder than the original.
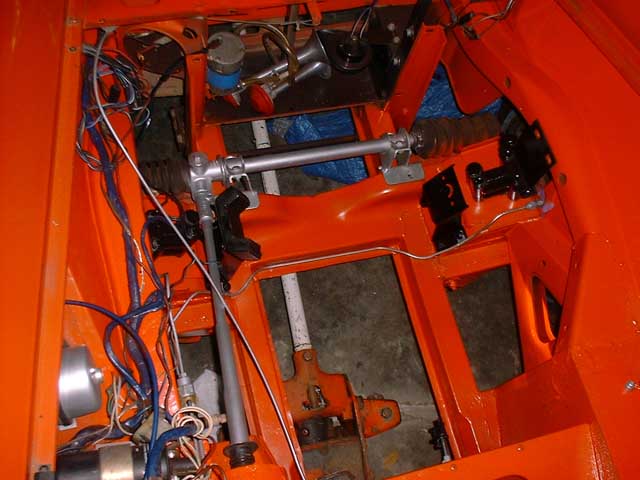
The tunnel. See that flange back there, the one with 4 holes in it?
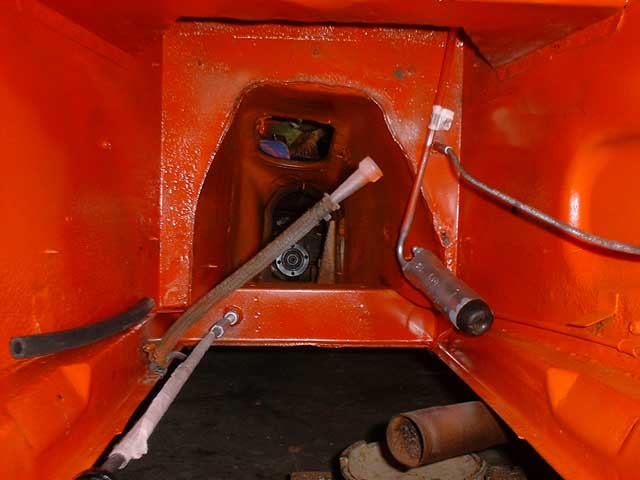
I had to ream the holes inward to fit the flange on the driveshaft.
Probably came that way from the factory. Possibly two different flanges as models changed.
It could have been an error on the part of the guys that changed the clutch.
The original bolts were damaged and were replaced.
7/7/04 The engine is back in!
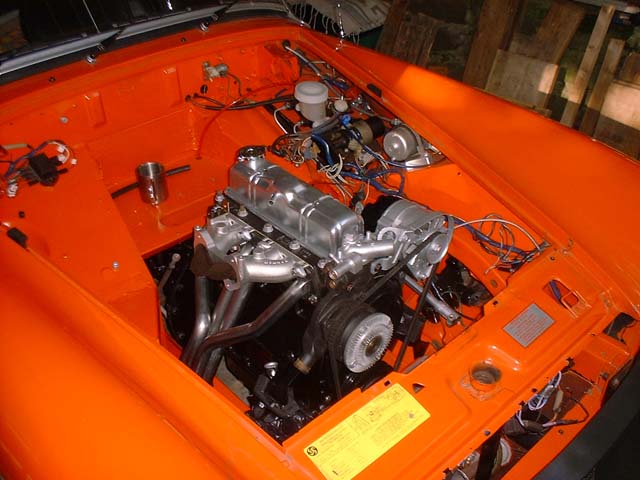
8/2/04 Started and ran the first time since March 2003.

The throttle cable and fuel filter are still not installed in this image.
The Lucas alternator was replaced because it was only putting out 6.5 volts,
and the Weber carb now has a K&N filter rather than the supplied velocity stacks.
Also replaced were the radiator and all hoses. The reason you can see the battery
is because I did not reinstall the heater box.
Every part I touch, no matter how small, gets cleaning and paint. I enjoy
this part of it as
much as driving, and it's a lot less dangerous,
unless you consider the brain damage from
breathing solvents, dust and
paint fumes. But hey! My wife and daughter say I'll never notice!
Summer of 2009
I chanced into a local who races Spridgets, and I mentioned
the dual-point distributor and timing.
He says he sets the timing on
race
engines at 20 - 25 degrees BTDC, so I set mine beyond the timing marks to
see how it runs.
Much better. Both points are gapped at .014
inches.
Spring 2010
Had to buy a battery. The original I bought in 2000 only lasted 3 or 4
years so I have been using one
I had purchased for a Ford POS that
I bought for my daughter, and when I sold the POS I kept the battery.
The one I traded in was dated 2001. It's amazing to get 9 years on a battery any more. I buy them
from Autozone.
October of 2010
The points needed adjusting, one was closing up and was at
.012, so I cleaned it and opened it up to .014.
Then I adventurously
advanced the timing a buncha degrees just to see how it runs. Better.
I leaned the fuel mix a bit and that's even more better.
Over the
next couple days I adjusted the idle mix and speed a couple times and it's
harder to start, but once it warms up it sure is nice.
I ended up
retarding the timing a few degrees so she will start more easily.
June 2011
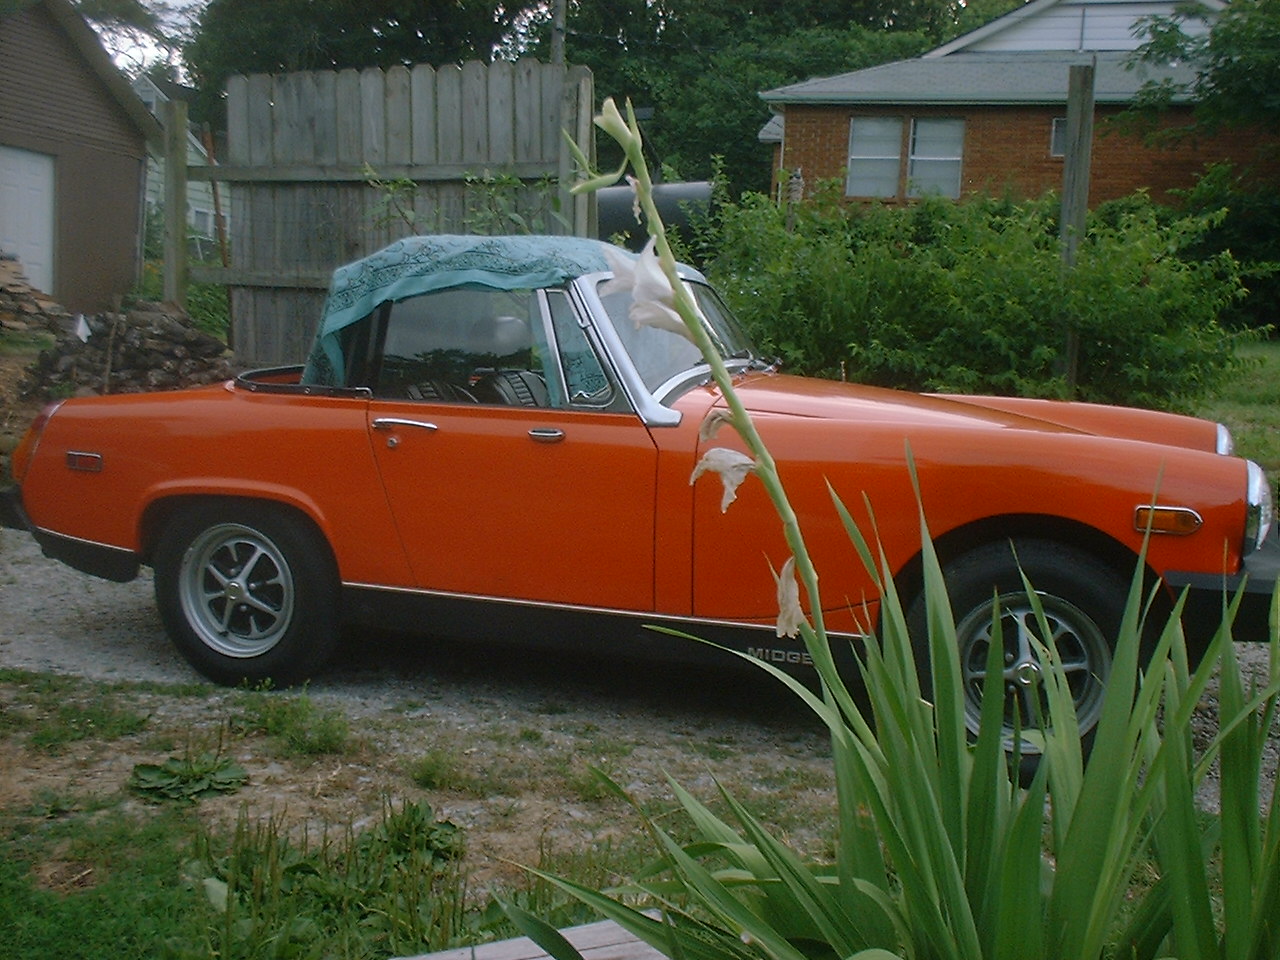
I removed the ragged original convertible top and bought a new one. I realize
that it's going to take two or three people to do this easily, as I have zero experience,
and I wanted to protect the interior from the blazing sun (the Solarge Corporation disavows
any responsibility for damage), so I safety-pinned an old Indian bedspread to the frame.
Click for larger image.
August 2011
The turn indicator stopped working. That part was replaced in 2000 (about 75
Bucks) when I got the car and this year a replacement was 90 Bucks. I installed it, put everything
back together and it still did not work. I tested wires, the blinker stat, and took out the
center console / radio to check on the emergency flasher switch and fuse. Once back together
the turn signals worked again. Could have been a dirty connector or fuse end.
Summer 2012
I started buying alcohol-free Sunoco fuel for all my machinery, including weed eater,
chainsaws, and the other 3 cars. The major reason is because all this old stuff has rubber
fuel components that are based on alcohol, so the typical gasoline eats the rubber parts. I
have replaced the fuel pump in my 92 Chevy 4 times in the last 15 years, and all because the
rubber hose between the pump (electric in the tank) and the steel fuel line gets soft and
won't hold pressure. For the MG I buy 93 octane.
Spring 2013
I've had the new top for 2 years taking up room on my bed, and realize that I don't know how
to install it so I got a local pro to do it for me. Cost about 150 Bucks, but he did a VERY
professional job at it and I'm glad to have it on.
Click for larger image.
Fall 2013
After driving the car most fair days this year I cranked up one morning, flipped on the
headlight switch, and the lights lit up and went out. I tried the switch again and the
toggle and spring jumped off the dash onto the floor. OH, GOODIE!! More parts to buy and
install.
Work performed 2013:
Work performed 2014:
Work performed 2015:
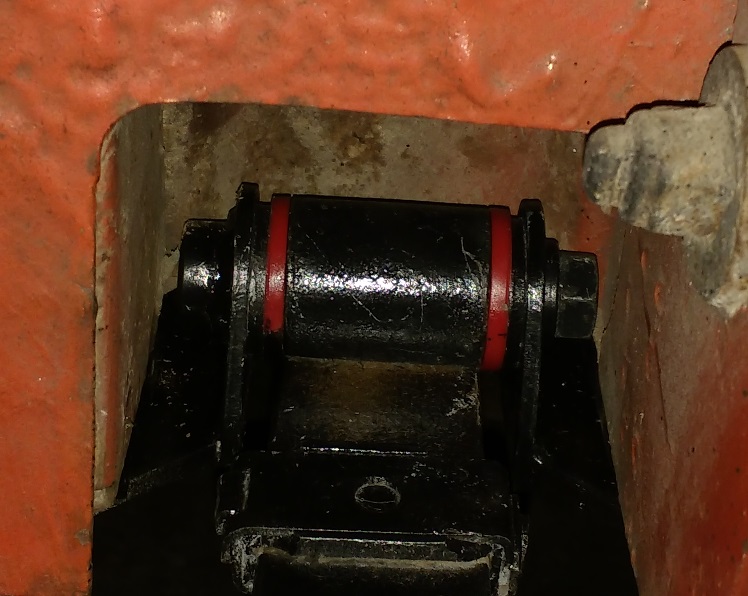
Old bushings
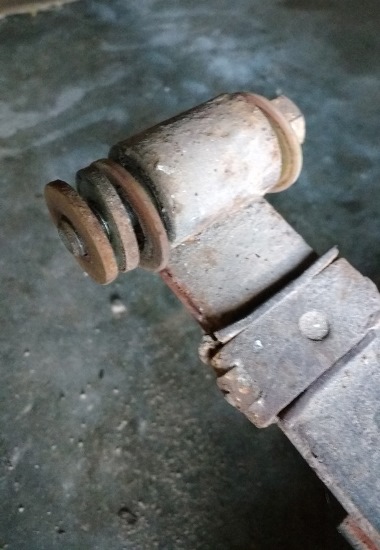
The polyurethane parts are pretty!
Work performed 2019:
Late December was still able to work outdoors.

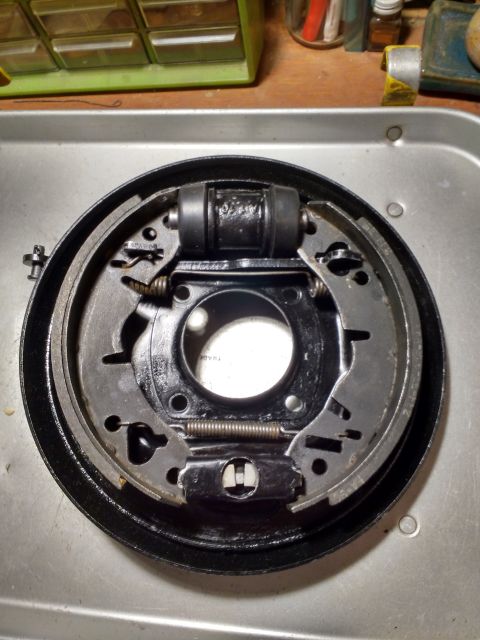
Lotsa cleaning and paint makes a tray of good looking parts.

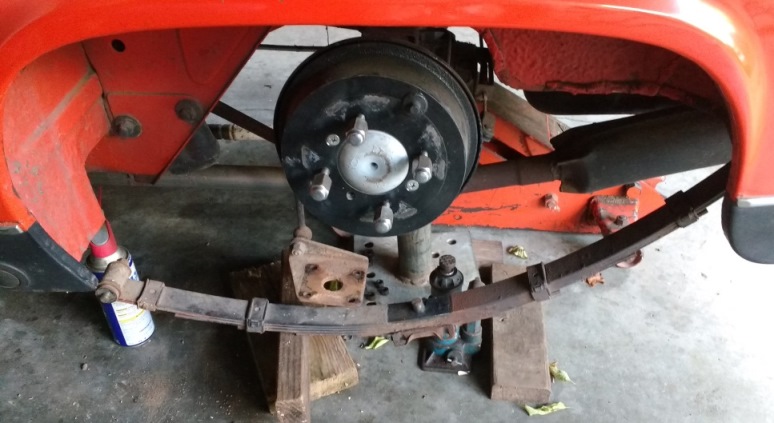
January 27th I reassembled the brake plate.
Work done May 2019:
Work done Spring 2021:
I cleaned the dirt off.
November 2021 I moved and have parked the MG in storage, have driven her a few times since.
Parts changed October 2023
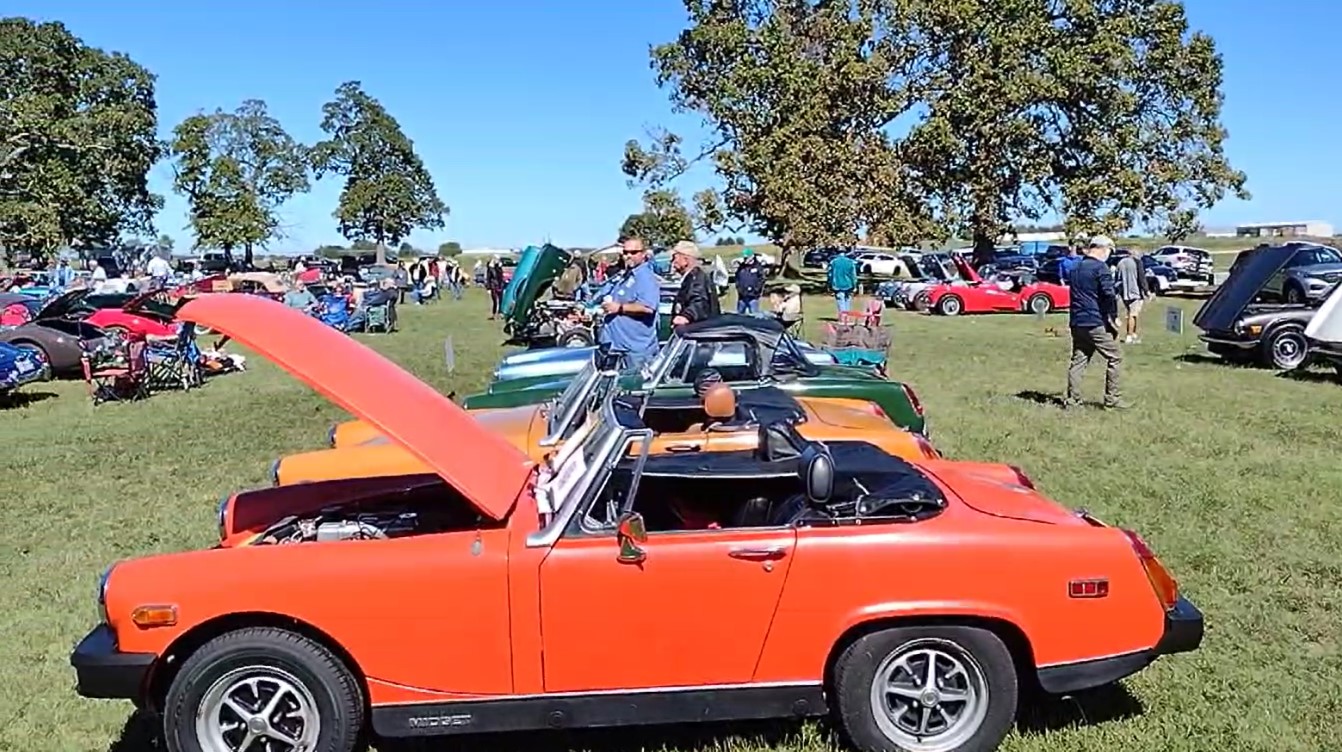
Took the car to her second show at Agri Park on Saturday October 7!
Last updated 10/16/23